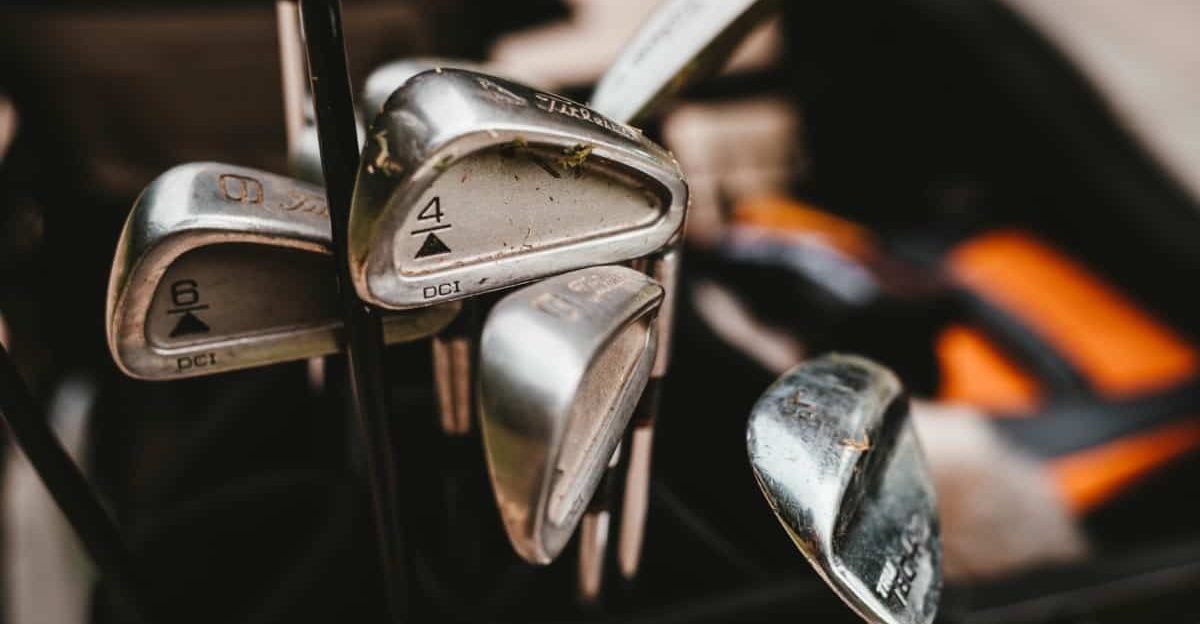
The paint on golf clubs can wear out due to frequent use. You can easily shine your old golf club heads to make them look like new. Moreover, you can also paint them at home, and you will not have to take them to a professional and spend a lot of money.
The first thing you need to do is rough up the metallic surface and get it ready for the paint. You can use paint remover to get rid of the old paint from the golf club heads. You can then use a degreasing agent to shine your golf club heads, use a primer to get it ready for the paint, and use an epoxy-based spray-can to repaint the golf club heads.
Today, you will learn how to remove the paint from your golf club heads properly, and how to properly repaint the heads without having to spend any extra money. You can get your golf club heads to shine like brand-new ones, and eliminate the need to replace them.
Can You Repaint Golf Club Heads?
Yes. You can easily repaint your golf club heads at home. First, you will have to remove any existing paint from the heads. You can apply a paint remover and let it soak for a few hours before removing the old paint with a sharp object. You can then use a water-degreasing agent on the golf club heads and an etching primer to get it ready for the final coats. Once it is dried, you can paint them with an epoxy-based spray can for the best results.
This is a great product for painting, refinishing, or touching up your golf clubs.
We recommend this product for removing scratches and scuffs from your clubs and making them look brand new!
How Can You Repaint Golf Club Heads?
Before you even think about repainting your golf club heads, you need to understand the difference between damaged golf club heads and worn-out golf club heads. If your golf club heads have stopped offering their peak performance and are damaged in several places, it is time to replace those golf club heads.
However, if your golf club heads are only looking old, have scratches, and look worn out, you can easily restore them to their original condition with the help of a proper and thorough paint job.
Therefore, in order to determine the difference between the two, you need to remove the old paint from the golf club heads and see if they only require a new coat of paint. If the golf club heads are damaged or bent at some points, then you cannot restore them to their original condition without the help of a proper professional.
However, if the body of the golf club heads is not chipped or bent at any place and they only need a new coat, you can repaint them with the help of a spray can and the following guide.
What Do You Need to Remove the Old Paint?
You cannot repaint your golf club heads without removing the old paint. Otherwise, the new paint will not stay on the golf club heads and will slowly chip away with the passage of time.
Therefore, you need to start preparing your golf club heads and start roughing them up while removing the existing layer of paint. In order to remove the existing paint from your golf club heads, you will need the following items:
- A powerful paint remover
- Acetone
- Any metal with the sharp edge
You Need to Use a Paint Remover on The Golf Club Heads.
The first thing you need to do in order to remove the paint from the golf club heads is to use a Q-tip dipped in a powerful paint remover. You can purchase any paint remover from your local hardware shop, or you can choose to go for acetone, that is considered one of the most powerful paint removers for metallic objects.
Dip the Q-tip in this acetone and apply a generous amount of this paint remover on top of your golf club heads. Make sure to apply a lot of paint remover to cover all the crooks and crannies of your golf club head.
Moreover, if you only want to repaint a specific area, make sure to cover the rest of the area with a masking tape. It will prevent the paint remover from seeping into those areas and damaging the paint.
One thing you need to make sure of is to wear personal protective gear, such as latex gloves and goggles. You need to protect yourself because some powerful paint removers are extremely harmful to your eyes and other sensitive areas, and you need to be prepared against them.
You Need to Let the Golf Club Heads Soak in the Paint Remover.
Some people make the mistake of applying the paint remover on top of the golf club heads, then quickly using a sandpaper or a metallic object to remove the previous coat of paint. Professionals highly recommend against this practice and recommend that you apply the paint remover and let the golf club heads soak for six hours before moving onto the next step.
Some people think that acetone and other powerful paint removers will quickly take care of the existing coat of paint, and they will not have to wait before removing the old paint. However, it would be best if you let the golf club heads sit with this paint remover for a few hours so that the liquid paint remover gets into every nook and cranny of your golf club heads and loosens up the previous coat of paint in a proper manner.
Otherwise, you will have to exert a lot of force to take care of the previous coat of paint, and you will end up damaging the integrity of a golf club head when you are scraping off the previous coat of paint.
Therefore, if you let your golf club heads sit in the paint remover for a few hours, you will not need to exert a lot of power to remove the existing coat of paint, and you will not damage anything other than the coat of paint.
You Need to Remove the Old Paint with A Sharp Object.
Once your golf club heads have sat in the paint remover for a few hours, you can easily start removing the existing coat of paint with the help of a nail or any metallic object with sharp edges. Make sure that you are wearing proper protective gear, such as goggles so that the old paint does not get into your eyes.
You can use a nail or a metallic object with sharp edges to scrape the existing coat of paint from your golf club heads. Professionals recommend taking care of the visible and easy areas first, before moving onto the hard-to-reach areas.
Moreover, professionals also recommend using a nail to scrape off any coat of paint from within the letters or edges of your golf club heads. This way, you will not get frustrated when the paint doesn’t come off, and you will be able to get the existing coat of paint from even the smallest and narrowest letters on your golf club head.
Take your time and do not damage the golf club by exerting too much force. Gently scrape off the top layer of paint with any sharp object and repeat the process several times to ensure that every inch is free from the existing coat of paint.
Once you have removed the existing layer of paint, your golf club heads should be ready for new paint. You can clean the heads with a damp cloth to remove any traces of the paint remover and get them ready for repainting.
What Do You Need to Repaint Your Golf Club Heads?
Now that you have eliminated any traces of the paint remover and the existing coat of paint, you can move on to the next step, which is actually to paint your golf club heads.
For this purpose, you will need to get the golf club heads ready with a degreasing agent and use an etching primer, and a spray can repaint the area. Here are the things that you will need during the repaint job:
- A water-based degreasing agent
- Canvas drop cloth
- Etching primer
- Masking tape
- An Empty spray bottle
- Epoxy paint
You Need to Degrease the Golf Club Heads.
Just because you have removed the existing coat of paint does not mean that your golf club heads are ready to accept any new layer of paint. If you are familiar with the process of painting, you need to understand that you have to prepare the surface to accept the new paint and to allow it to stick properly.
Therefore, you need to prepare your golf club heads with the help of a water-based degreasing agent that will remove any pollutants or particles from the surface that may hinder the process of painting.
You can apply a water-based degreasing agent on your golf club heads and let them soak for a few hours. Moreover, you also need to make sure that you keep your golf club heads in a singular position while you are letting them soak with the help of a water-based degreasing agent.
If there are any areas of your golf club head or shaft that you do not want to repaint, you can use masking tape to cover those areas so that the degreasing agent does not impact those.
You need to Use the Etching Primer to Ready the Golf Club Heads.
The next thing you need to do is pour your etching primer into a spray bottle. In general, the majority of modern era etching primers come in spray cans, but if you have an etching primer that is not in a spray can, you need to put it in an empty can and apply a very thin layer of this etching primer on top of your golf club heads.
You need to make sure to apply only a thin layer of etching primer as thick layers tend to run down and offer an improper finish for the golf club heads. Therefore, you need to dilute the etching primer with the help of acetone and then mix it in the spray bottle and apply a very thin layer on the golf club heads.
Once you have applied the etching primer, you need to let the golf club heads soak in this primer for at least 6 hours. This will make sure that the etching primer gets into every nook and cranny of your golf club head and gets the surface ready for the new coat of paint.
You Can Now Paint the Golf Club Heads.
You can now finally move towards painting your golf club heads with an epoxy-based paint. Professionals recommend using four to six different coats of paint on your golf club heads and allowing a drying period of 30 to 40 minutes between every coat.
This means that you can apply a single coat on your golf club head, and then you will have to wait for at least 40 minutes before going in for the next coat of paint. Moreover, it would be best if you also remembered to dilute your paint with the help of an acetone liquid as thick layers or paints will run down and offer an improper finish.
This is a great product for painting, refinishing, or touching up your golf clubs.
So, to dilute your epoxy-based paint, you need to put the paint into the empty spray bottle, and use a few drops of acetone with this paint. Mix it well and then apply a thin layer of paint on top of your golf club heads.
Make sure that you cover every area of your golf club heads. Otherwise, the outcome will look improper and unbalanced. Moreover, you also need to repaint the golf club heads with 4 to 6 different coats of paint to get a proper finish.
If you do not want to use a spray bottle to paint your golf club heads, you can also use a needle-tip applicator to fill in your paints or even use a small toothbrush to get the job done.
You Need to Remove the Excess Paint.
If you are not an expert painter, you will end up using excess paint or overusing the paint on your golf club heads. This is why you will need to use an acetone-soaked cotton swab to remove any amount of access paint from the edges of your golf club heads once you have completed this step.
You can use any random cotton swab, dip it in acetone and use it gently and softly to remove any excess paint from the edges. It would help if you remembered to wear personal protective gear, such as latex gloves, to protect yourself from the harmful impact of acetone on your skin.
Moreover, it would be best if you also remembered that we previously used acetone to remove the existing coat of paint, and this is why you need to be extremely careful when using the acetone-soaked cotton swab to remove the excess paint. You need to make sure that this does not come in contact with the paint that you want to keep on your golf club heads, and this only removes the excess paint from the edges or places where you did not want any paint.
Another thing you can do is purchase a fine-grit sanding block to buff out any small or leftover scratches from the repaint job. You can use this fine-grit sanding block to make sure that the final outcome of the repaint job looks as shiny as possible.
These fine-grit sanding blocks are designed to offer a clean and smooth outcome for metallic surfaces and can easily take care of any dings and scratches without removing or harming the integrity of the paint.
You Need a Sealer for A Long-Lasting Paint Job.
This is the final step in repainting your golf club heads, and it requires you to seal the new coat of paint with the help of a clear sealer or a lacquer-approved sealer for use with epoxy-based paints.
You only need to apply two thin coats of this sealer on top of your new coat of paint. These sealers are designed to make sure that the new paint will not give in to the harsh environmental conditions or the daily wear and tear. Moreover, this sealer will also make sure that your new coat of paint will last for years to come.
If you decide not to use a sealant, you should know that the new coat of paint will start chipping off soon, and you will have to repaint the golf club heads from the scratch. Therefore, use a powerful sealant to enjoy a long-lasting paint job.
You can apply two thin coats of a sealer on top of your golf club heads and allow a drying period of 30 minutes between each coat. Once you have applied this sealer, you can let the golf club heads dry for at least one day before using them for golfing.
How Can You Paint Your Driver Head?
If you also want to repaint your driver head, you will need to remove the existing paint with the help of any powerful paint remover or and acetone liquid.
Now that you have removed the existing coat of paint from your driver head, you can then use powerful sandpaper to take care of the driver head. Sanding the head with sandpaper will make sure that there are no residual dust particles accumulated on the surface, and the new coat of paint will stick on without any problems.
Next, you can apply a very thin layer of etching primer on top of your driver head, and make sure that the surface is ready for the new coat of paint. Once you have applied the etching primer, you need to let your driver head dry for a few minutes before you apply another coat of primer. You need to apply two coats of thin primer and then let the driver head dry for six hours.
Now that the primer has dried, you can paint the driver head with two or three parts of polyurethane paint. Professionals recommend using this kind of paint as it is best for the surface of your driver head.
You can use two to three different coats of paint with 30 minutes between each coat. Once you have applied the last layer of paint, you need to let your driver head dry for at least 24 hours before using it for your next golfing session.
You also need to make sure that you do not apply any thick coat on your driver head, as it will result in a lumpy outcome. Therefore, you can dilute your paint with the help of acetone liquid and then apply it on top of your drive ahead.
How Can You Paint the Golf Club Shafts?
Now that you have painted your golf club heads, you can also easily paint your golf club shafts without any problem. Here are the things you will need to repaint your golf club shafts:
- Sandpaper
- Acrylic Oil Paint or Epoxy-based Paint
- Painter’s Tape
- Drop Cloth
- Latex-Based Primer
- Two blocks of wood
You Need to Get the Golf Club Shafts Ready for New Paint.
The first thing you need to do is get your golf club shafts ready for the new coat of paint. For this purpose, you can easily use sandpaper for sanding the steel shafts and getting them ready before painting.
Sanding your steel shafts will help roughen it up and get rid of any residual dust or dirt particles that are accumulated on your shaft. Moreover, sanding the golf club shafts also allow the new paint to adhere properly and last a few years.
You need to make sure that you cover all the other parts of your golf clubs shaft with painter’s tape so that the latex-based primer does not impact any other area. Moreover, you also need to protect yourself with the help of latex gloves so that the primer does not interact with your skin.
The next step in getting your steel shaft ready for the new coat of paint is to cover it with primer and let it dry for a few hours. You can use a latex-based primer to apply two thin layers on top of your golf club shaft and let it dry in the sun for a few hours.
Once you have applied two thin layers of latex-based primer, you can let your golf club dry before moving onto the next part. You can place the golf club shaft on a drop cloth for drying it.
You Can Now Use the Paint for Repainting Your Golf Club Shafts.
Once the primer has dried, you can easily use an acrylic oil-based paint or any epoxy-based paint to repaint your golf club steel shaft.
You can pick any color paint of your choice and apply thin coats of this paint on top of your shaft. It would help if you made sure that you constantly revolve the shaft in order to properly cover every single inch of your shaft with the new coat.
Moreover, you also need to dilute your chosen paint with the help of acetone liquid. This will make sure that thick layers are not applied on your steel shaft and do not offer an improper finish. Therefore, you need to apply only thin layers of paint on your golf club steel shaft.
Now that you have repainted your golf club shaft with the new paint, you can use two blocks of wood and let the shaft dry for two days. Professionals recommend placing one block of wood under the grip and another block of wood under the golf club head. This way, you will be able to let your golf club steel shaft dry without touching the shaft.
Moreover, you can also place the drop cloth under the golf club steel shaft, so that it does not drip on your beautiful floor. Let the shaft dry for two days before using it for your next golf game.
What Is the Bottom Line Here?
Repainting your golf club heads does not have to be an ordeal if you stick to the tips mentioned above. This step-by-step guide is designed to make sure that you easily and clearly remove any existing coat of paint from your golf club heads, get it ready for repainting, and then use proper paints to get a brand-new look from your golf club heads.
You can also take your golf club heads to a proper professional to get them repainted, but you can try the steps mentioned above to repaint your golf club heads at home. You can purchase all the necessary items at your local hardware store, stick to the steps mentioned above, and easily repaint your golf club heads. Make sure to protect yourself from the harmful chemicals during the repainting process with the help of personal protective gear.